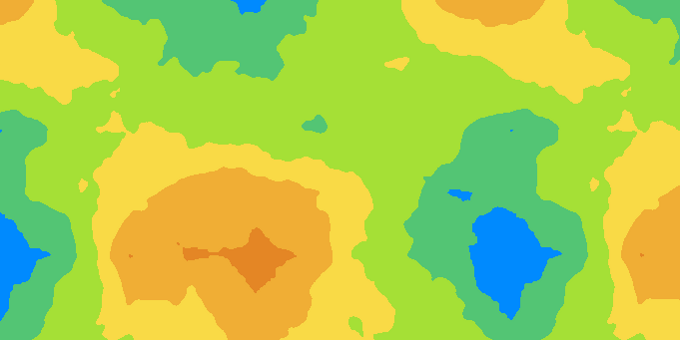
 (Originally appeared in Dev.Mag Issue 20, released in February 2008.) Perlin noise is the foundation of many procedural texture and modelling algorithms. It can be used to create marble, wood, clouds, fire, and height maps for terrain. It is also very useful for tiling grids to simulate organic regions, and blending textures for interesting transitions. In this article I will explain how to implement Perlin noise, and how you can use it in your games.
Edit 19 June 2011: The examples were originally given in pseudo-code. Unfortunately, these contained some mistakes, which many commenters helped to sort out. I finally replaced the pseudo-code with real C#, copied-and-pasted from a working file (which you can download below). Hopefully it will make the algorithms easier to understand. Note that efficiency was not considered at all; the code is a fairly direct translation of the original pseudo-code.
Edit 19 May 2012: I always thought the cloudy noise described in this article is called Perlin noise. Turns out, it is not. The worst is, I cannot say with hundred percent confidence what it is called. Fractional Brownian Motion (fBm) seems to be the most likely candidate, but to be honest, I am still figuring out whether my simulation is technically equivalent to the ones described on Wikipedia (nevermind that Wikipedia may also have it wrong).
Real Classical Perlin noise, and simplex noise, can also be combined, just like the “smooth noise” is combined in this article, to give cloudy noise. This is what confused me (and others, I presume). Cloudy noise generated from Perlin noise looks much better (it is not as blocky), although for many purposes the cloudy noise described here will work fine. So if you are interested in how to make cloudy noise… read on. I will follow up at a later stage with more concrete information about real Perlin noise.
Implementation
Written in its concise mathematical form, the Perlin noise generation seems daunting, but it is actually easy to implement. There are two steps:
- Generate a number of arrays containing “smooth” noise. Each array is called an octave, and the smoothness is different for each octave. (See the first 7 images in Figure 1).
- Blend these together. The result is the last image in Figure 1.
That’s it! Let’s look at each of these two steps.
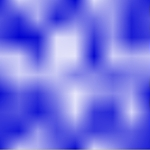 Wavelength: 64 Wavelength: 64Frequency: 0.015625 |
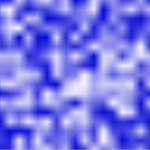 Wavelength: 32 Wavelength: 32Frequency: 0.03125 |
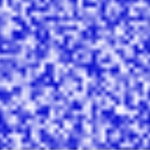 Wavelength: 16 Wavelength: 16Frequency: 0.0625 |
 Wavelength: 8 Wavelength: 8Frequency: 0.125 |
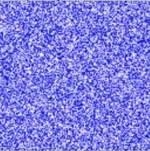 Wavelength: 4 Wavelength: 4Frequency: 0.25 |
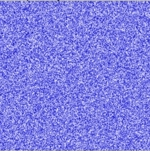 Wavelength: 2 Wavelength: 2Frequency: 0.5 |
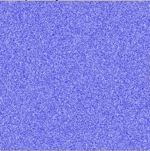 Wavelength: 1 Wavelength: 1Frequency: 1 |
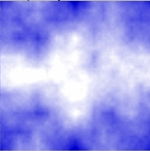 Perlin noise Perlin noise |
Figure 1
Generating Smooth Noise
First, you need to create an array with random values between 0 and 1. This array must be the same size as the array of Perlin noise you need.
float[][] GenerateWhiteNoise(int width, int height) { Random random = new Random(0); //Seed to 0 for testing float[][] noise = GetEmptyArray(width, height); for (int i = 0; i < width; i++) { for (int j = 0; j < height; j++) { noise[i][j] = (float)random.NextDouble() % 1; } } return noise; } |
For creating the kth octave, sample the noise array at every point (i*2k, j*2k) , for all i, j, and interpolate the other points linearly. The value 2k is called the wave length of that octave, and the value 1/2k is called the frequency.
The following pseudo C snippet shows how the kth octave is generated. Index variables are integers, and remember that integer division gives a floored integer result (for example, 5 / 3 gives 1).
float[][] GenerateSmoothNoise(float[][] baseNoise, int octave) { int width = baseNoise.Length; int height = baseNoise[0].Length; float[][] smoothNoise = GetEmptyArray(width, height); int samplePeriod = 1 << octave; // calculates 2 ^ k float sampleFrequency = 1.0f / samplePeriod; for (int i = 0; i < width; i++) { //calculate the horizontal sampling indices int sample_i0 = (i / samplePeriod) * samplePeriod; int sample_i1 = (sample_i0 + samplePeriod) % width; //wrap around float horizontal_blend = (i - sample_i0) * sampleFrequency; for (int j = 0; j < height; j++) { //calculate the vertical sampling indices int sample_j0 = (j / samplePeriod) * samplePeriod; int sample_j1 = (sample_j0 + samplePeriod) % height; //wrap around float vertical_blend = (j - sample_j0) * sampleFrequency; //blend the top two corners float top = Interpolate(baseNoise[sample_i0][sample_j0], baseNoise[sample_i1][sample_j0], horizontal_blend); //blend the bottom two corners float bottom = Interpolate(baseNoise[sample_i0][sample_j1], baseNoise[sample_i1][sample_j1], horizontal_blend); //final blend smoothNoise[i][j] = Interpolate(top, bottom, vertical_blend); } } return smoothNoise; } |
Note that the line:
int sample_i0 = (i / samplePeriod) * samplePeriod; |
is not the same as
int sample_i0 = i; |
because the division automatically floors the result to give an integer, so that sample_i0 is the largest multiple of the samplePeriod dmaller than i. For example, if i is 7 and samplePeriod is 3, then sample_i0 is 6.
The following function returns a linear interpolation between two values. Essentially, the closer alpha is to 0, the closer the resulting value will be to x0; the closer alpha is to 1, the closer the resulting value will be to x1.
float Interpolate(float x0, float x1, float alpha) { return x0 * (1 - alpha) + alpha * x1; } |
There are a variety of interpolation schemes; the best one to use depends on your application.
See here for some common interpolation schemes.
Blending the Arrays
To make the final array, you add weighted values of all the smooth noise arrays together. The weight used for each octave is called the amplitude.
Any values can be used for the amplitudes, with different effects. A good starting point is to use a weight of 0.5 for the first octave, 0.25 for the next octave, and so on, multiplying the amplitude with 0.5 in each step. In this scheme, the value 0.5 is called the persistence of the noise.
After you have added all the noise values, you should normalise it by dividing it by the sum of all the amplitudes, so that all noise values lie between 0 and 1.
float[][] GeneratePerlinNoise(float[][] baseNoise, int octaveCount) { int width = baseNoise.Length; int height = baseNoise[0].Length; float[][][] smoothNoise = new float[octaveCount][][]; //an array of 2D arrays containing float persistance = 0.5f; //generate smooth noise for (int i = 0; i < octaveCount; i++) { smoothNoise[i] = GenerateSmoothNoise(baseNoise, i); } float[][] perlinNoise = GetEmptyArray(width, height); float amplitude = 1.0f; float totalAmplitude = 0.0f; //blend noise together for (int octave = octaveCount - 1; octave >= 0; octave--) { amplitude *= persistance; totalAmplitude += amplitude; for (int i = 0; i < width; i++) { for (int j = 0; j < height; j++) { perlinNoise[i][j] += smoothNoise[octave][i][j] * amplitude; } } } //normalisation for (int i = 0; i < width; i++) { for (int j = 0; j < height; j++) { perlinNoise[i][j] /= totalAmplitude; } } return perlinNoise; } |
In practice smooth noise arrays are not actually created; rather, the noise is calculated and added to the final array on the fly. How this is done is not shown here; check out the link at the end of the article for a link to example code.
Perlin noise can sometimes look diluted. For many applications this is fine; however, sometimes you might want something a bit more dramatic. This can easily be achieved in one of the following ways:
- Increase the contrast as a post-processing step using image editing software.
- Use a higher persistence (0.7 is good for 6 octaves), and skip the normalisation step. Just make sure to clamp your final values to 1.
The first method is better when you want tight visual control. The second method is more convenient as it is part of the creation process and can hence be better automated.
For more implementation tips, see Implementing and Debugging the Perlin Noise Algorithm.
Edit 18 June 2014: You can also implement the ideas here on a hex grid. Interestingly, the artifacts on a hex grid are very reduced. See: “Cloudy” noise on a hex grid.

Applications
Textures
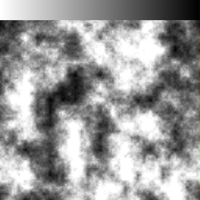
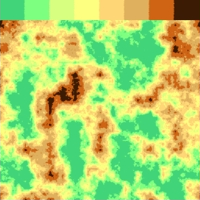
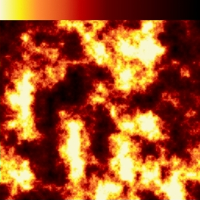
One of the simplest uses of Perlin noise is to map it with a gradient. This can be used for attractive maps or cheesy fire effects (which you can animate – explained in another section) as shown in Figure 2. You can do this with your image editor, or programmatically. For the latter approach, you need a gradient function that returns a colour given a number between 0 and 1. This function is then called for every element in you Perlin noise array to obtain a colour, which you can store in a separate array, from which an image can be created.
 Grayscale gradient Grayscale gradient |
 Gradient with discrete colours Gradient with discrete colours |
 Fire gradient Fire gradient |
Figure 2
Here is a code snippet showing how it works:
Color GetColor(Color gradientStart, Color gradientEnd, float t) { float u = 1 - t; Color color = Color.FromArgb( 255, (int)(gradientStart.R * u + gradientEnd.R * t), (int)(gradientStart.G * u + gradientEnd.G * t), (int)(gradientStart.B * u + gradientEnd.B * t)); return color; } Color[][] MapGradient(Color gradientStart, Color gradientEnd, float[][] perlinNoise) { int width = perlinNoise.Length; int height = perlinNoise[0].Length; Color[][] image = GetEmptyArray(width, height); for (int i = 0; i < width; i++) { for (int j = 0; j < height; j++) { image[i][j] = GetColor(gradientStart, gradientEnd, perlinNoise[i][j]); } } return image; } |
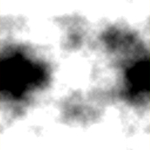
Perlin noise can be used to blend between two textures, as shown in Figure 3. You should use Perlin noise with very high contrast to prevent textures from looking fuzzy. The following code snippet shows how to blend two images using Perlin noise.
Color[][] BlendImages(Color[][] image1, Color[][] image2, float[][] perlinNoise) { int width = image1.Length; int height = image1[0].Length; Color[][] image = GetEmptyArray(width, height); for (int i = 0; i < width; i++) { for (int j = 0; j < height; j++) { image[i][j] = Interpolate(image1[i][j], image2[i][j], perlinNoise[i][j]); } } return image; } |
 Image 1 Image 1 |
 Image 2 Image 2 |
 Perlin noise Perlin noise |
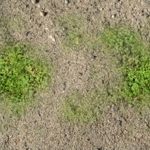 Blend using noise Blend using noise |
Figure 3
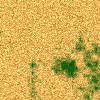
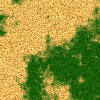
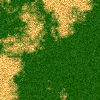
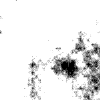
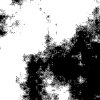
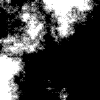
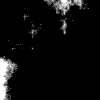
Of course, you would not create textures this way, but it can be used for interesting real time transitions. Figure 4 shows very cheap plant growth using only three textures and appropriate blending.
The following function computes a series of frames, a transition from one image to the other. We calculate a blend mask, and for each frame, we adjust the greys according to the frame number, so that the first frame gives a white blend mask, and subsequent blend masks become blacker, until the last one is completely black.
float[][] AdjustLevels(float[][] image, float low, float high) { int width = image.Length; int height = image[0].Length; float[][] newImage = GetEmptyArray(width, height); for (int i = 0; i < width; i++) { for(int j = 0; j < height; j++) { float col = image[i][j]; if (col <= low) { newImage[i][j] = 0; } else if (col >= high) { newImage[i][j] = 1; } else { newImage[i][j] = (col - low) / (high - low); } } } return newImage; } Color[][][] AnimateTransition(Color[][] image1, Color[][] image2, int frameCount) { Color[][][] animation = new Color[frameCount][][]; float low = 0; float increment = 1.0f / frameCount; float high = increment; float[][] perlinNoise = AdjustLevels( GeneratePerlinNoise(image1.Length, image1[0].Length, 9), 0.2f, 0.8f); //initial adjustment gives more frames with action. for (int i = 0; i < frameCount; i++) { AdjustLevels(perlinNoise, low, high); float[][] blendMask = AdjustLevels(perlinNoise, low, high); animation[i] = BlendImages(image1, image2, blendMask); //SaveImage(animation[i], "blend_animation" + i + ".png"); SaveImage(MapToGrey(blendMask), "blend_mask" + i + ".png"); low = high; high += increment; } return animation; } |
 |
 |
 |
 |
 |
 |
Real time transitions using Perlin noise
 |
 |
 |
 |
 |
 |
Blend textures
Figure 4.
Landscape Generation
When Perlin noise is interpreted as a height map, an interesting terrain can be created (Figure 5).
Softimage Mod Tool is a free 3D modelling and animation application especially suited for games. One of its features is a built-in landscape generator that can use Perlin noise, among several others, to generate landscape meshes.
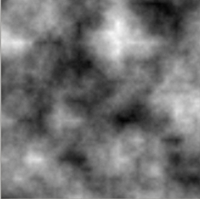 Height map generated from Perlin noise Height map generated from Perlin noise |
 Mesh generated from height map Mesh generated from height map |
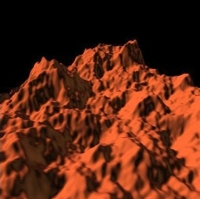 Rendered mesh Rendered mesh |
Figure 5
Object Placement
Perlin noise can also be used to place objects on a grid more naturally than can be done with uniform random placement. To do this, follow these steps:
- Define k sets of similar looking objects.
- Create Perlin noise large enough to cover your grid. Each pixel of noise should correspond with one cell in the grid.
- For every cell in the grid, find the corresponding pixel of noise, and use the following formula to decide from which set you should choose an object: i = floor (n / (1.0 / k)). You choose objects from set S(i), usually randomly.
You can use this method even if you do not use a grid to place objects. Just define a grid so that there is roughly, on average, one object per cell. For every object to be placed, first determine the cell it corresponds to, and then proceed as above. If this requires a too large grid, you can use a smaller grid, so that there is more than one object per cell. Use linear interpolation to obtain a Perlin value for an object. You won’t get the Perlin pattern inside a grid cell – but it will hide the fact that there is a grid.

Figure 6 – In large worlds, the Perlin patterns can easily be seen. Here three sets of objects have been used: city, suburban, and industrial. (Art: Chris Cunnington)
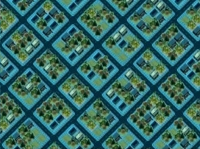
For you to see the characteristic Perlin pattern, the world has to be quite large (Figure 6). However, you can benefit from Perlin placement even for small worlds. In a small world, there will be much more variation between successively generated worlds than there would be had they been generated by another method, as the images in Figure 7 illustrate.
 |
 |
 |
Figure 7 – A big variety of small worlds. (Art: Chris Cunnington)
Sometimes you can construct your sets so that a certain property maps to the set number in an obvious way. For example, for sets of buildings, it would make sense to let the shortest buildings be in set 0, and the tallest buildings in the last set. Arranging your objects in this way ensures that very short buildings are never next to very tall buildings. This can enhance the illusion of “spatial progression”.
Sometimes there is no relationship between the set number and any property, and you benefit nothing from one set of objects always being close to objects in the same or adjacent sets. In this case, you can increase the amount of variety between different worlds by permuting the set indices, i.e., every time the algorithm runs, i = 0 will select objects from a different set. This can easily be accomplished by creating a shuffled array m containing the integers 0..k-1, and then choosing objects from the set S(m(i)).
It is very noticeable when two adjacent objects are the same, and this happens much more frequently with Perlin placement than with uniform random placement. There are three ways in which you can reduce or eliminate this effect:
- Create more objects. To get the same number of adjacent objects in a grid as you would get with uniform random placement, you would need as many objects in a set as you would need in the entire collection for uniform random placement! If you have k sets, you will need to create k times the amount of art!
- Another nifty trick is to further subdivide each set into “white” and “black” objects. The grid is then treated as a black and white checker board, and objects are placed so that “white” objects are always on “white” squares, and “black” objects always on “black” squares. This trick can be expanded to more than two colours, and non-periodic grid patterns, but is the subject of another article.
- In some games, you can reduce the jarring effect by introducing small random transformations (rotation, scaling, mirroring, and for certain types of objects, shearing). This is especially effective for plants and other organic objects. You can also introduce small random colour variations, although you should take care not to destroy the overall colour and lighting of the game.
For this application, you might find that the first and last sets are under- represented. This has to do with the way Perlin noise generates more greys near the centre than it generates whites and blacks. The easiest way to rectify this problem, is to duplicate the under-represented sets.
The more sets you have, the smaller contiguous regions will be, and the more interesting your grid will be. If you have a small number of sets, you might wish to duplicate the sets for a more interesting world. Make sure that duplicate sets are not next to each other (for example, S[0] and S[1] must contain different elements) – otherwise this step will have no effect.
Be careful when tweaking a world generation parameter: remember that Perlin worlds look quite different from each other with the same parameter settings, something that can easily throw off any “trends”. Always run the algorithm a few times with the same settings to make sure what you perceive as a general occurrence is not an isolated anomaly.
Perlin Noise Tiles
Perlin noise can be made tileable by using a power of 2 for the array dimensions (128 × 128, for example).
You can also create a set of tiles by using a set of base noise arrays with the same first row and first column. All tiles in the set will tile smoothly with each other.
Perlin Noise Animation
The algorithm for generating Perlin noise is easily modified to make animation sequences. The basic idea is to generate a block of 3D Perlin noise, cut it in slices, and use each slice as an image of the animation sequence. If you use a power of two for the time dimension, the sequence will loop smoothly as well.
This sequence can be used for object placement to simulate transitions that will add life to your game.
The 3D version of the algorithm is quite slow – on my machine a lazy-man’s implementation takes about thirty minutes to produce 256 frames of a 256 × 256 image sequence.
Download
References
If you want to know more about Perlin noise, check out these handy sources for additional information on the subject.
- Atkins, M.; Barad H.; Gerlitz, O.; Goehring, D. Real-Time Procedural Texturing Techniques Using MMXMore texture generating techniques using Perlin noise.
- Elias, H. Perlin Noise.A very good introduction to Perlin noise.
- Gustavson, S. Simplex noise demystified.Explains classic Perlin noise, and an improvement thereof (simplex noise). The treatment is technical, but comes with very readable source code.
- Perlin, K. Makin Noise.The creator of Perlin noise’s website.
- Zucker, M. The Perlin noise math FAQ.A deeper look into the mathematics of Perlin noise.
Hi Gaming Fanz
I just want to know, these tutorials are they about developing game engines from scratch and if they are where can a person start (do you need a framework i.e TGE)
Posted by Mozira at 16:55:49 on 20 May 2009
As with most of our tutorials, this one can be applied in whichever environment you like, and is less about building ‘engines’ as it is about making content for whichever engine you happen to be using.
While this particular tutorial is more abstract than most, its implementation is not limited to any particular language, engine or environment, and can be applied wherever it is needed. It’s up to you to decide where, in this case, though a later piece on Poisson sampling will give you a few ideas.
As for getting started, there’s no concrete answer. The Dev.Mag-endorsed way involves signing up and posting on the Game.Dev forums (http://forums.tidemedia.co.za/nag/forumdisplay.php?f=9). Further than that and you’ll have to be more specific. Sign up there and ask around.
top = interpolate(baseNoise[sample_i0][sample_j0],
baseNoise[sample_i1][sample_j1], horizontal_blend);
is wrong. Should be
top = interpolate(baseNoise[sample_i0][sample_j0],
baseNoise[sample_i1][sample_j0], horizontal_blend);
(0,0)->(1,1) is a diagonal.
You are quite correct. I’ve amended the article, thank you for pointing this out.
Thank you for describing perlin noise alghoritm.
I thing, i’ve found another error in smoothing:
sample_i1 = sample_i0 % width;
should be:
sample_i1 = (sample_i0 + samplePeriod) % width;
and
sample_j1 = (sample_j0 + 1) % height;
should be
sample_j1 = (sample_j0 + samplePeriod) % height;
W
I don’t think this tutorial would be complete without an introduction to the concept of turbulence distortion, and using it to make marble and wood textures.
Thanks for the background info, but the sampling code is just hopelessly wrong. It works for octave 0 and nothing else.
All you’re doing is reading the same pixels multiple times, because you’re not striding to the neighbors correctly. What you need to actually make it WORK (which also makes it tile correctly provided you’re feeding it to a POT texture) is:
sample_i1 = (sample_i0 + samplePeriod) % width;
…
sample_j1 = (sample_j0 + samplePeriod) % height;
DOH! Sorry Wendigo – I completely missed your post and spent half an hour working it out myself for no reason. :/
Hopefully someone will fix the article – or maybe the next guy won’t be quite as oblivious to the comments as I was. 😛
Thanks for spotting the errors; unfortunately I have seen the comments a bit late. But it has been corrected now. 🙂
Just want to say thanks to the creator for this tutorial =)
I have a question. In processing, when you generate a 2D noise function it comes up in gray. How can I have it in a different color like light blue for example.
There are several things you can do. The simplest for blue (that goes to white) is to invert your colour (giving you a dark yellow/orange). Multiply your noise array now with this colour, giving you noise that range from black to yellow/orange. Now invert this entire array, giving you noise that range from white to blue.
A more flexible way is to use this formula:
new_colour[x, y] = noise[x, y] * col1 + (1 – noise[x, y])* col2
(where the noise range from 0…1). This uses the noise to blend between the colours, so you could get the same effect if you use white and blue for the two colours. (But you could also use blue and yellow, for example).
You said “Perlin worlds look quite different from each other with the same parameter settings”.
As far s I know this is false if you are using a pseudo random generator. If you use the same seed to generate the world then it should always be the same perlin world for a given set of parameters.
Yup, you are right – I assume in that paragraph that you would seed it differently (using the time, for example) to get a different noise pattern for each run. If you don’t, then your world should be the same each time.
Thanks for the tutorial. Very useful.
I found this, regardless of it’s problems, to be one of the clearest and best tutorials on Perlin noise on the internet. For that reason I’ve spent some time contributing some feedback.
All my fixes are in the generatePerlin method/function:
perlinNoise[i][j] += smooth[k][i][j] * weight;shouldn’t weight be amplitude? You’re introducing a new variable weight here that is performing the function of what you describe amplitude to be used for.
—-
This next one kept me from getting proper results for hours, cannot believe I figured it out.
Quoted code:
	for(k = 0; k < octaveCount; k++)

	{

		amplitude *= persistance;

		totalAmplitude += amplitude;
for(i = 0; i < width; i++)
for(j = 0; j < height; j++)
perlinNoise[i][j] += smooth[k][i][j] * weight;
}
The problem here is that k should iterate from the octaveCount down to 0, not up. Otherwise since the amplitude decreases by half with each iteration, you would be putting strong emphasis on the first octave (the fine and grainy one) and less and less emphasis on the later octaves, the smoother ones. Should be the other way around so that the large smooth octaves are strongly pronounced when blended and then have more and more transparent finer gradients added to them. Am I wrong? At least my testing sessions agree.
—-
the lines:
//normalisation

	for(k = 0; k < octaveCount; k++)

	{

		perlinNoise[i][j] /= totalAmplitude;

	}
… are a little too simple in pseudo. Would be more clear if it had (if this would be correct) an iteration through i and j within the k. However I can’t be sure since I don’t fully understand how the normalization all balances out to bring the values back to between 0 and 1.
—
Thank you for your contribution to game development, indie in particular.
Hi Joseph,
Thanks for your feedback. I am embarrassed that a few lines of code can contain so many oversights. Thanks for pointing them out. I intend to rewrite the thing, and paste the code directly from where it is running (I thought this is what I did, but clearly it can;t be!)
Thanks again, I will make the corrections to the main article soon.
ht
No problem. Consider it an open source tutorial, we all contribute and eventually with community effort it’s perfect.
Also, does your running code produce tile-able noise? The fact that your tutorial is using a width and height modulus on the sampler in the smoothing function seems correct and that it should work in concept. However it’s not so for me. Very hard edges.
In other news,
I’ve created a Java class with the option of linear or cosine interpolation. I’ll try to remember to blog it and post a link when I’m done. Thanks for this tutorial it’s helped me create a great tool.
Nevermind, I’ve found that it only tiles smoothly when you set the width and height to a power of 2. Otherwise there’s a remainder that causes an unbalanced overlap that doesn’t match up with the start of the sampling run. Hope that makes sense, it’s not easy to put this into words.
OK, to be more specific (and this is not a bug but help to those having problems tiling) the noise will only tile if (octaves-1)^2 (the sampling period) can go into the width evenly without remainder. Same for height.
So 512px width will tile because the sampling period for each octave up to ~9 octaves will fit cleanly into the total width.
However 512+8px will not tile for anything above 4 octaves because 4 octaves has a max sampling period of 8px and 5 octaves has a max sampling period of 16px. 8px fits evenly, 16px will eventually overlap at the end.
Kinda deep and obscure, but anyone who’s playing around with their own custom Perlin noise code or having trouble getting tiling results will benefit from that tidbit. Enjoy.
Pingback: 2D Cave Generator Looking Good | JosephKnight.com Fine Art & Design
First off, great article, one of the only articles I could find that clearly and completely defines a method of programming Perlin Noise with fractal Brownian motion. However, I saw a line that looked curious, and I believe that this:
sample_i0 = (i / samplePeriod) * samplePeriod;
and
sample_j0 = (j / samplePeriod) * samplePeriod;
is simply:
sample_i0 = i;
and
sample_j0 = j;
Is this how it is supposed to work?
Thanks for the comment!
No. The division there is integer division (I will make a note in the text), so that calculates the biggest multiple of samplePeriod equal to or lower than i (or j).
For example, with samplePeriod of 4, sample_i0 is 0 when i is between 0 and 3 inclusive, 4 when i is between 4 and 7, and so on.
In this case then, we only look at each 4th pixel, and interpolate between these to fill in the rest.
Ah, ok thanks, I had thought it might be something like that.
Hi! How would I convert this into 3D noise?
I’m assuming I would add:
int sample_k0 = (k / samplePeriod) * samplePeriod;
int sample_k1 = (sample_k0 + samplePeriod) % length;
float depth_blend = (k – sample_k0) * sampleFrequency;
and then interpolate with the other values… but I’m not sure which values I need to interpolate with and by what amount (horizontal? vertical? depth?)
Hi Matt,
You are on the right track.
In 1D, we interpolate between 2 points, based on the relative distance (between 0 and 1) we are from the left point.
In 2D, we interpolate between 4 points. The two top points are blended as above, based on the relative distance from the left point. We do the same with the two bottom points. Then we have two blended values, which we finally blend together based on the relative distance from the top. This is what the algorithm in the article does.
Now, in 3D, we blend between 8 points. The 3D “image ” is just a collection of slices, each slice is at a different k value, that indicates the depth. The 8 points we interpolate with will lie in two of these slices, 4 each. In each slice, we interpolate the four points as in the 2D case, giving as two blended values. In the final step, we blend these together based on the relative depth (a value between 0 and 1). Does this makes sense at all?
I am a bit terrified to write code without s compiler, but here is the gist of the 3D smoothnoise algorithm:
float[][] GenerateSmoothNoise3D(float[][][] baseNoise, int octave)
{
   int width = baseNoise.Length;
   int height = baseNoise[0].Length;
   int depth = baseNoise[0][0].Length;

   float[][][] smoothNoise = GetEmptyArray(width, height, depth);

   int samplePeriod = 1 << octave; // calculates 2 ^ k
   float sampleFrequency = 1.0f / samplePeriod;

   for (int i = 0; i < width; i++)
   {
      //calculate the horizontal sampling indices
      int sample_i0 = (i / samplePeriod) * samplePeriod;
      int sample_i1 = (sample_i0 + samplePeriod) % width; //wrap around
      float horizontal_blend = (i - sample_i0) * sampleFrequency;

      for (int j = 0; j < height; j++)
      {
         //calculate the vertical sampling indices
         int sample_j0 = (j / samplePeriod) * samplePeriod;
         int sample_j1 = (sample_j0 + samplePeriod) % height; //wrap around
         float vertical_blend = (j - sample_j0) * sampleFrequency;

         for(int k = 0; k < depth; k++)
         {
            int sample_k0 = (k / samplePeriod) * samplePeriod;
            int sample_k1 = (sample_k0 + samplePeriod) % length;
            float depth_blend = (k – sample_k0) * sampleFrequency;

//closest slice
         //blend the top two corners
         float top = Interpolate(baseNoise[sample_i0][sample_j0][sample_k0],
            baseNoise[sample_i1][sample_j0][sample_k0], horizontal_blend);

         //blend the bottom two corners
         float bottom = Interpolate(baseNoise[sample_i0][sample_j1][sample_k0],
            baseNoise[sample_i1][sample_j1][sample_k0], horizontal_blend);

         //final blend
         float closest_slice = Interpolate(top, bottom, vertical_blend);

//furthest slice
         //blend the top two corners
         top = Interpolate(baseNoise[sample_i0][sample_j0][sample_k1],//note k1!
            baseNoise[sample_i1][sample_j0][sample_k1], horizontal_blend);

         //blend the bottom two corners
         bottom = Interpolate(baseNoise[sample_i0][sample_j1][sample_k1],
            baseNoise[sample_i1][sample_j1][sample_k1], horizontal_blend);

         float furthest_slice = Interpolate(top, bottom, vertical_blend);

         //final blend
        smooth_noise[i][j][k] = Interpolate(closestSlice, furthest_slice, depth_blend);
      }
   }

   return smoothNoise;
}
I hope there are not many errors in the sample above!
Keep well,
-ht
Thankyou SO much for the reply!! This is the only tutorial I’ve actually found that gives an accurate description of what actually goes on within the algorithm (all the others I’ve found just hand the code to you and make use of very ‘obfuscated’ naming conventions…).
Yep, I get you, so you basically perform the same operations as you do in 2D noise, but two times for each point (by using the nearest and farthest slice) and then interpolate. I did have a basic idea of how it would work in 3D, but I really wasn’t sure – your example has (thankfully!) confirmed them!
Thanks for the example code, aswell!
Thanks again, and thanks for the awesome tutorial,
Matt.
Actually, I’ve got one more question. How do I ‘zoom’ into the output?
Cool, glad it was useful 🙂
What do you mean with zooming exactly? Looking at deeper slices, or looking at the noise at higher resolutions? Do you want to implement real-time infinite zooming?
Well, what I’m trying to do is use the 3D noise for terrain generation (for a game inspired by Minecraft, a bit of a summer project), treating each value as ‘density’, I can determine if a block should be ‘filled’ or not.
At the moment, using the 3D noise (with an adapted version of your generatePerlinNoise function), I get a large cube with occasional gaps (I got the very same with other algorithms). The solution to making it more terrain-like was to use the ‘zoom’ approach:
noise += generateNoise(((double)x)*frequency/zoom,((double)y)/zoom*frequency)*amplitude;This is from a 2D version, but it did work with another 3D noise algorithm (which I really don’t understand, thats why I’m interested in this implementation, it actually has comments and documentation!).
Heres the 3D version I used to use:
getnoise += perlinNoise3d.noise(((double)i) * frequency / zoom, ((double)j) * frequency / zoom, ((double)k) / zoom * frequency) * amplitude;Thanks for the help! 😀
For reference, heres an example of the kind of results I get with the old algorithm:
http://i52.tinypic.com/2eofexx.png
aaand heres what I get without ‘zooming’:
http://i53.tinypic.com/33bdbhf.png
Thanks for all the help!!!
Matt.
Hmm, if I understand correctly, dividing the frequency (by a number greater than 1) will simply mean points get sampled closer together. The problem with the above implementation is that there is not enough pixels in the base noise to support it.
To get the same effect, generate noise of 2, 4, or 8 times the size you need, and then map into that. For instance, say your original requirement is 8x8x8. And suppose we zoom by a factor of 4. Then generate noise in a grid 32x32x32, and then just modify your access indices to compensate. (How exactly depends on how you access the noise… if you can’t figure it out, post a piece of your generation algorithm that access the noise grid, and I’ll take a look.)
Hi! I think I understand what your saying, I should generate a 32x32x32 grid of noise, and then I’m guessing I access each 8th value as a way to zoom?
Yup 🙂
Hi! The problem with that method is that large areas of terrain would mean HUGE arrays would need to be created :/
BUT!!! Your idea did actually just give me an idea, instead of actually using a baseNoise array for generating the values, why not just use a PRNG?
I found this snippet of life-saving code on my travels when looking for a good algorithm, and I *think* it should work for this problem!
public float random(int seed, int x, int y, int z)

{

    int n = seed + x*73 + y*179 + z*283;

    n = (n << 13) ^ n;

    int m = (n * (n * n * 60493 + 19990303) + 1376312589) & 0x7fffffff;

    return 1.0f - ((float)m / 1073741824.0f);

}
Thoughts??
Thanks for all this help!!
Matt.
The horizontal_blend is always equal to zero… and thus I dont get the proper smoothed images like mentioned in this article http://devmag.org.za/2011/06/25/implementing-and-debugging-the-perlin-noise-algorithm/
I dont understand this part:
float horizontal_blend = (i – sample_i0) * sampleFrequency;
The variable “i” and “sample_i0” are always equal and thus always returning zero for the horizontal_blend… But my samplePeriod is fine “1,2,4,8,16,32” …
anyone know why?
Hi! I’m getting this same problem as well, could it be something wrong with the code in the article… :S
Nope, it is not a problem in the code 🙂
iandi_sample0are not always equal. See my response to comment 13.Aaaaaah! Yup, I get it now xD
Yeah I found the error on my part.
In C# when you divide 2 Integers as such:
float horizontal_blend = (i / sample_i0) * sampleFrequency
It does not return decimals for the division. But for my case in javascript you can divide 2 integers together and it will return a float and then multiplying it again did not get right of the decimals.
Yeah, Python has the same problem if you use true division. There you can use a special operator to get floor division. Not sure if JavaScript has a special floor division operator, but you could always use
Mathf.Floor(x / y).Fantastic, this tutorial is precisely what I was looking for. I had to adapt the code a little bit for C# in XNA, but I got it working, and the results look pretty good!
Any tips on how can I put multi gradient as in images from examples. Like for fire?
it’s a great tutorial i have seen so far. And I am just wondering about how the perlin noise implements the random wave of the sea. the thing is that I used a Sin function that produces a very regular wave height and I soppose using perlin might give a impressive result for random wave height. can you help me thanks
Has anyone attempted this in Java?
What I’m trying to do is generate some noise and write it to a raw image file. I can then load this file in and generate terrain from it.
The problem I’m having is writing it to the file. If I convert the float array to a byte array I just get a black image (I guess that conversion ignores anything after the decimal point, so every pixel in the image becomes 0 – black). If I write the array to the file as a float I get something that doesn’t quite look like noise (and is twice the size of what you supply the generateWhiteNoise function (2048*2048 when supplied with 1024*1024), there are gray lines running down the image every 3 pixels (you can see what I mean here: http://i43.tinypic.com/2hs5hl4.jpg). And that is without applying any smoothing.
If I apply smoothing then I get more gray lines (of varying shades) inbetween the original gray lines.
I’ve tried using different seeds but the gray lines remains so I wonder if I’m just writing it to the file completely wrong, I’m using FileOutputStream and DataOutputStream and blah.writeFloat(noise[i][j])
Anyone have any ideas?
[the save file code]
FileOutputStream out = new FileOutputStream(“blah.raw”);
DataOutputStream test = new DataOutputStream(out);
for (int i = 0; i < noise.length; i++)
{
for(int j = 0; j < noise[0].length; j++)
{
test.writeFloat(noise[i][j]);
}
}
out.close();
Hey Tom,
As far as I can see, your file writing code looks OK. There are (at least) two other places where it can go wrong; how do you generate the image from the data? It is possible that there is a small error in that code. It is also possible that there is a small error with the noises generation code. Perhaps you can post that as well. You say you are not smoothing at all, but are you still sampling a noise array? That is a third potential place where an error could have snuck in. I see the gray value is 33% grey; perhaps that provides a clue… are you dividing by three anywhere in the code?
-ht
Cheers for the reply,
I don’t generate any image data as I’m just saving it to a raw image file (.raw – don’t think it has any headers and all that jazz, and I’ve successfully saved a byte array to it – that wasn’t randomly generated but read from another .raw file).
I wanted to check the noise array and my writing to a file was working properly before I smoothed or did anything else to the array so I’ve literally only done the following:
float noise[][] = new float[1024][1024];
noise = perlin.generateWhiteNoise(1024, 1024);
public float[][] generateWhiteNoise(int width, int height) {
Random rand = new Random();
rand.setSeed(0); // I’ve attempted it with and without this line
float noise[][] = new float[width][height];
for(int i = 0; i < width; i++)
{
for(int j = 0; j < height; j++)
{
noise[i][j] = (float)rand.nextDouble() % 1;
}
}
return noise;
}
Then save the data
FileOutputStream out = new FileOutputStream(“blah.raw”);
DataOutputStream test = new DataOutputStream(out);
for (int i = 0; i < noise.length; i++)
{
for(int j = 0; j < noise[0].length; j++)
{
test.writeFloat(noise[i][j]);
}
}
out.close();
What is interesting is that even though the array has been set to 1024*1024 and the generatenoise function is supplied with 1024*1024 the final raw image is 2048*2048 and 4096KB.
Hmmm ok, then it probably has to do with the file format as you thought initially. I am not too familiar with the exact details of raw files, perhaps you should try writing bytes instead (is float not 4 bytes? that could explain the x4 data, and the fact that the grey lines are at intervals of 4 pixels).
Just scale it in range:
test.writeByte( (byte) (255 * noise[i][j]);
Duh, that would obviously work. I am an idiot.
Thank you for the help. Now, on to the next stage….
Hi! Awesome tutorial. Just a question, how would I be able to tile the white noise(infinite generation)? I have your current code working very nicely, but it would be great if I could get some great infinite terrain.
Once again, thanks!
It should tile if your base texture is a power of two, and you sample mod the image width / height. The algorithms are already written for this, so they should tile as long as your base texture is fine.
Thanks for the answer! I have one more question: what do you mean by “sample mod”? I apologize, I am self-taught, and I certainly not an expert at all programming and math topics.
Thanks,
Flafla2
Pingback: Explosions! Worlds! « Code from the Wellspring of Incompetence
Hi. The Tutorial itself is really helpful but the descriptions are a bit misleading…
You were implementing a fbm based on value noise, not perlin noise.
Perlin Noise is gradient based and more complicated, but gives
a better quality.
Pingback: Lunatic Pandora » Perlin Noise is cool.
MadeSomeNoise has a good point and it’s something that has been bugging me since I started doing some research on Perlin noise.
Most of the implementations of Perlin Noise seem to drop the classic approach (gradient based) making it harder to understand and to compare notes with Ken Perlin’s implementation.
Hmmm, yes. Thank you both for pointing out this issue.. I will have to look into it. o.0
Hi! A very nice explained tutorial! It was very easy for me to understand and transform the code for Matlab. Thank you!
I have only one question about this line:
int samplePeriod = 1 << octave; // calculates 2 ^ k
In Matlab there is the bitsll that could do it, but I am using an earlier version that it hasn't it. So could you give some suggestions how exactly works? My two versions are:
% samplePeriod = bitsll(2,octave);
samplePeriod = 2^octave;
Thanks.
Yup, your method should work.
Pingback: Implementing and Debugging the Perlin Noise Algorithm » devmag.org.za
Very nice article. I appreciate the author taking the time to detail his work.
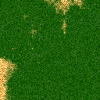
Quick question though: how would one create the image at the top of the page? Generation of a random image with solid color layers like that would be quite helpful to a project I am working on right now. I don’t need a noise map with changing levels of transperency between the two gradients but something like the above image would work wonderfully.
Thanks for any help.
That image was generated from the cloudy image by mapping values to a fixed set of colours; for example
(See Figure 2, the middle image, and the explanation in that area for more detail).
There were two additional steps to make the image nicer.
First, before mapping to colour, I adjusted the levels to get a better spread of greys. Normalize the image so that values occupy the full range between 0 and 1:
And adjust the gamma
(Where
ais a suitable value… I just eyeballed one in Photo Shop, but I am sure there is a way to determine an optimum one algorithmically).The second step is to run a median filter on image after colors have been mapped. This makes the shapes of the coloured regions smoother. (The median filter can also be run before you map colours. The results are slightly different but very similar).
Pingback: Getting More out of Seamless Tiles » devmag.org.za
Pingback: [1GAM] My little adventure with the Perlin Noise and Simplex Noise (Part 1) | Anthony Pigeot - Game Designer & Programmeur
Thanks for the article, I’m implementing a similar system for Ultimate Stickman game. A few notes that may help others: Be creative with the Perlin Value. I for instance use the largest significant digit for different ‘area’ or ‘terrain’ attributes, and the lower values for more randomize object placement. (aka, you can use the bits wisely for a lot of great extra features, the least significant ones provide good randomness, while being fully reproducible (if you are saving game levels, this can be important for the integrity of the universe)).
Also, a small optimization for your code (may have reduced clarity for the article) – your last nested for-loops could be eliminated by putting it in the previous blending double-for once it’s reached the last octave. not that a couple milliseconds will really matter unless doing this several times a frame..
I just realized a talent all programmers share.. 2 actually. 1) the ability to spot nuances in everyone else’s code but our own, and 2) the assness to point it out. :).. thanks for sharing.
That was an excellent tutorial, now have a nice Javascript implementation for a Perlin noise based tilemap, thanks!! Couldn’t find anything else that broke it down so nicely that I could actually understand the math and implement it in a day. Awesome!
Awesome work Herman. I spent all day trying to get 3 different perlin noise implementations going and yours worked first time! Thank-you 😀
Works great! Except increasing the octave count ends up driving all resulting values up. So if I ask for 10 octaves, All resulting “noise” values are the same (to about three sig. digits). Is that normal? also, by trial and error, asking for 200 octaves appears to give the exact same result as asking for 8 (always using the same seed for reproduceability)
Creating random values at the grid locations and blending is called “value noise”. Very different from Perlin gradient or simplex noise.
Pingback: Procedural Generation | Senior Capstone Dev Blog
Pingback: Minecraft-Clone – Part 2 | LearningGeek Blog
Pingback: Tiled perlin/value noise texture with (2^n)+1 size | Question and Answer
Pingback: Making a game for fun and… that’s it | Magical Adventures in Pixie Land
Pingback: Undergeek » Blog Archive » Minecraft in Unity3D
Pingback: Extraction: Map generation | Magical Adventures in Pixie Land
The tutorial is Nice, but could your please rework it again?
“Perlin Noise” is just never used in your code, at all, it’s kinda missleading as your article goes um rather soon if you google for Perlin.
You are generating a fBm:
The combination of several layers of noise, each time with double the frequenzy and half the amplitude.
The Noise used to generate each layer can be of any type you want, you can even mix em, can give some quite interresting results.
About Perlin-Noise:
It is a continuose Randomnumber geneartor, the numbers don’t suddenly jump but gradually change, cause the generation is gradient-based.
Simplex-Noise is an update to perlin-noise, that uses a little different approach and has less overhead, is faster, has no artifacts (comparet to little in perling and HUGE in Vlaue-noise you used in your example).
Pingback: Perlin Noise and its Application | The Emerging Blog
Pingback: Underestimating Perlin Noise | Dylan Gattey
Pingback: Bibliography | The Emerging Blog
Pingback: A simple texture algorithm – faster code and more results | code-spot
Pingback: Gabor Filters | r3dux.org
Pingback: Perlin Noise Help | Question and Answer
Pingback: “Cloudy” noise on a hex grid | Gamelogic
Pingback: Terminante | RPG PART I – 2D procedural terrain with noise.
How can I make the algorithm generate noise in a given coordinate?
Just like Flafla2’s question, but, without repeating it.
I mean, different noises that connect to each other. For example:
var topLeftNoise = GeneratePerlinNoise(width: 512, height: 512, x: 0: y: 0, octaves);

var bottomLeftNoise = GeneratePerlinNoise(width: 512, height: 512, x: 0: y: 512, octaves);

var topRightNoise = GeneratePerlinNoise(width: 512, height: 512, x: 512: y: 0, octaves);

var bottomLeftNoise = GeneratePerlinNoise(width: 512, height: 512, x: 512: y: 512, octaves);
And so on…
Pingback: Culling and optimization – Jucarave.com